Last updated: 3 March 2025
Under [Settings], you can set a range of parameters for when you are making withdrawals from your Binance account. Functionalities include whitelisting addresses, adjusting time frames, enabling one-step withdrawals, and selecting between on-chain or off-chain transfers.

1. Log in to your Binance account and hover over the profile icon. Click [Settings].

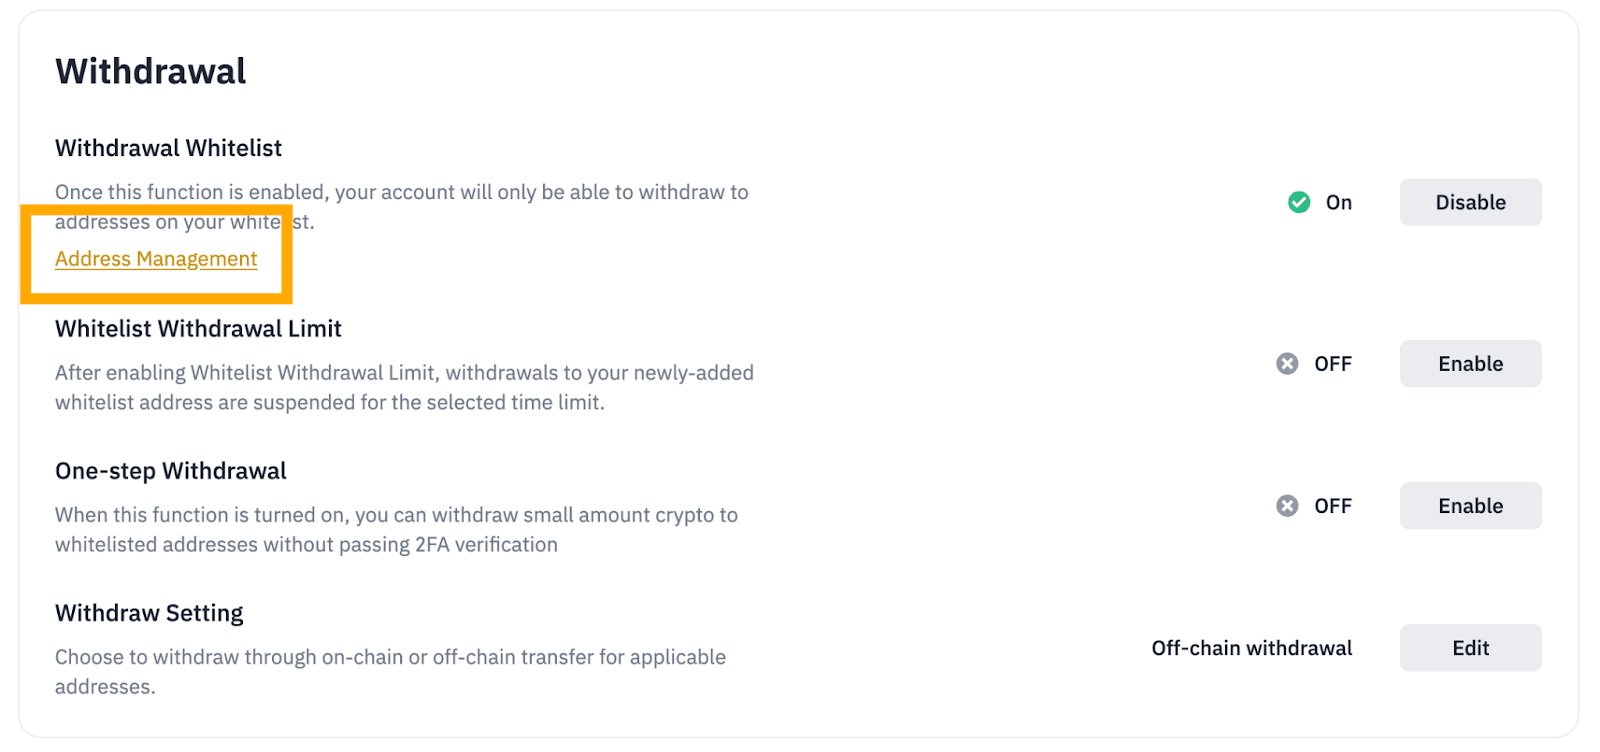
2. Scroll down to the [Withdrawal] section. Click [Enable] next to [Withdrawal Whitelist].

3. Please note that when you enable the withdrawal whitelist function, you can only withdraw to addresses on your whitelist. Click [Enable] to proceed.

4. Verify the request using your passkey or 2FA. Your withdrawal whitelist is now enabled.

1. Under [Settings] - [Withdrawal], click [Disable] next to [Withdrawal Whitelist].
Please note, once ‘Whitelist Withdrawal’ is disabled then the 'Whitelist Withdrawal Limit' function will not be visible.

2. Read the notes carefully before clicking [Confirm].

Note: Once the withdrawal whitelist function is disabled, you’ll be able to withdraw to any address. However, if you’ve enabled the withdrawal whitelist limit previously, your withdrawal will be temporarily suspended for a certain time limit (24, 48, or 72 hours).
3. Verify the request with passkey or 2FA.
1. Under [Settings] - [Withdrawal], click [Address Management].
2. Hover over [Add] and select [Add address] or [Add Multiple Addresses].

3. Label the address using a familiar name. Then, either select a crypto for the address or set it as a universal address. Note: If selecting a specific crypto (e.g., BNB), you must also select the network that the address belongs to.

4. If you’ve selected [Address Origin (Optional)], choose the appropriate address origin:
5. Check the box next to [Add Address to Whitelist], then click [Save].

6. Complete 2FA to verify your request. Once verified, the address will be added to your whitelist.
Note: Modifying the withdrawal whitelist may lead to temporary withdrawal suspension for a specific time limit (24, 48, or 72 hours).
1. Click the [...] next to the address you want to remove from the whitelist. Then, select [Remove from Whitelist].

2. Click [Remove] to confirm.


The one-step withdrawal function allows you to withdraw a small amount of assets to a whitelisted address without having to complete 2FA verification.
Please note that you may still be required to complete 2FA after enabling the one-step withdrawal function.
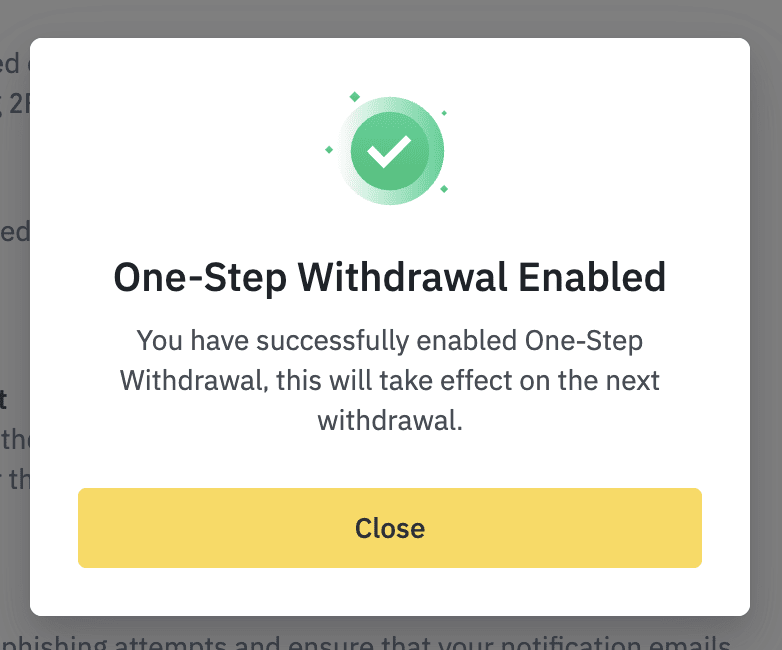
1. Under [Settings] - [Withdrawal], click [Enable] next to [One-step Withdrawal].

2. Select a quota for the one-step withdrawal and click [Confirm].

3. Verify with your passkey or 2FA.
4. To change the quota or disable the function, click [Manage].

The whitelist withdrawal limit function suspends withdrawals to newly added whitelist addresses for a selected time period. The security feature prevents unauthorized withdrawals if a hacker adds a new address, giving you time to secure your Binance account.
1. Under [Settings] - [Withdrawal] - [Whitelist Withdrawal Limit], click [Enable].

2. Select a time period to limit withdrawals to your newly added whitelist addresses. Click [Confirm].

3. The whitelist withdrawal limit has been enabled for the selected time period. To change the time period or disable the function, click [Manage].

4. Read the notes carefully before clicking [Confirm].
Please note that once disabled, you will be able to withdraw to all whitelisted addresses immediately, including newly added ones. For security reasons, it is recommended to keep the whitelist withdrawal limit enabled.
You can add up to 200 withdrawal addresses to your whitelist.
To manage your whitelist:
Go to [Settings] - [Withdrawal], and click [Address Management].

